To add users to your Proton VPN for Business plan, you must first create an organization.
Learn how to create an organization
Once you have created an organization, you can add users to it. The number of users you can add depends on the number of licenses you purchased as part of your plan.
Learn how to add more licenses
There are two ways you can add users to your organization:
- Individual users — If you’re a small organization or only have a few users, you can fill out each user’s details in your Proton VPN settings.
Learn how to add individual users - Multiple users — If you have multiple users, you can download a CSV template from Proton VPN settings, fill it in, and then upload it. We’ll then create all the users specified on the sheet. You’ll only be able to add as many users as you have licenses for, so check that you have sufficient licenses before uploading the CSV.
Learn how to add multiple users
How to add individual users to your organization
- Log in at account.protonvpn.com with your Proton Account username and password.
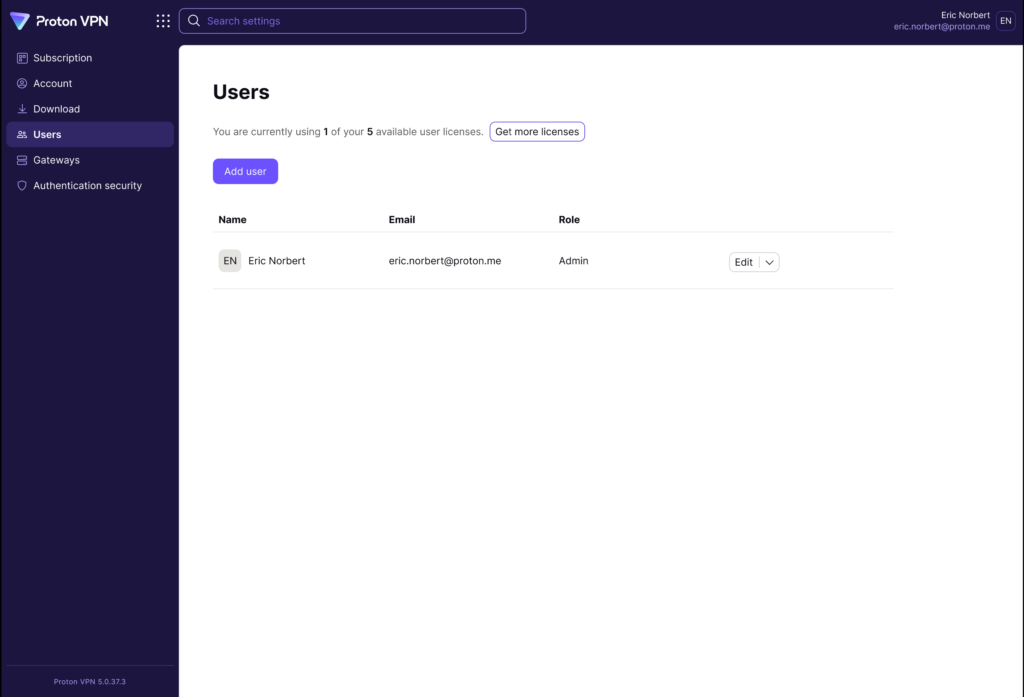
2. Click on Users in the menu on the left, then click Add user.
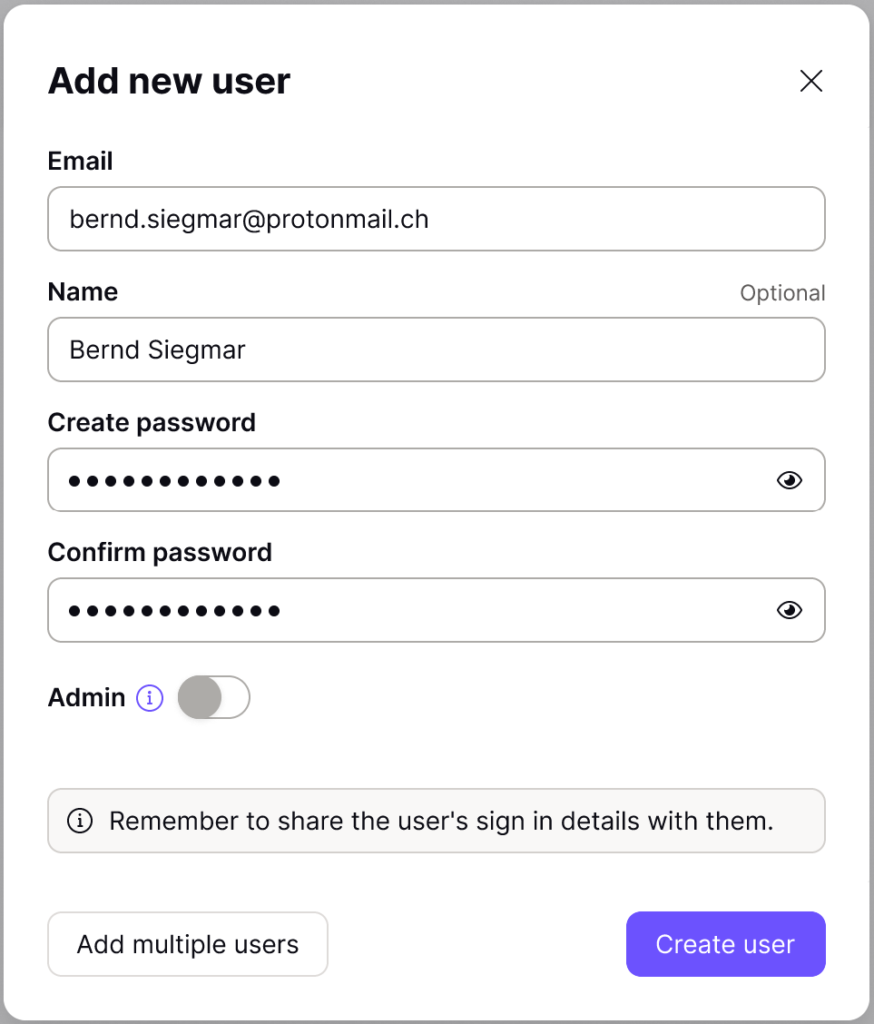
3. Fill in the user’s email address, username, and password into the correct fields.
You can also choose to give this user admin rights, which will let them make changes to your subscription, add, edit, or delete other user accounts, and give admin privileges to other users.
When you’re done, click Create user.
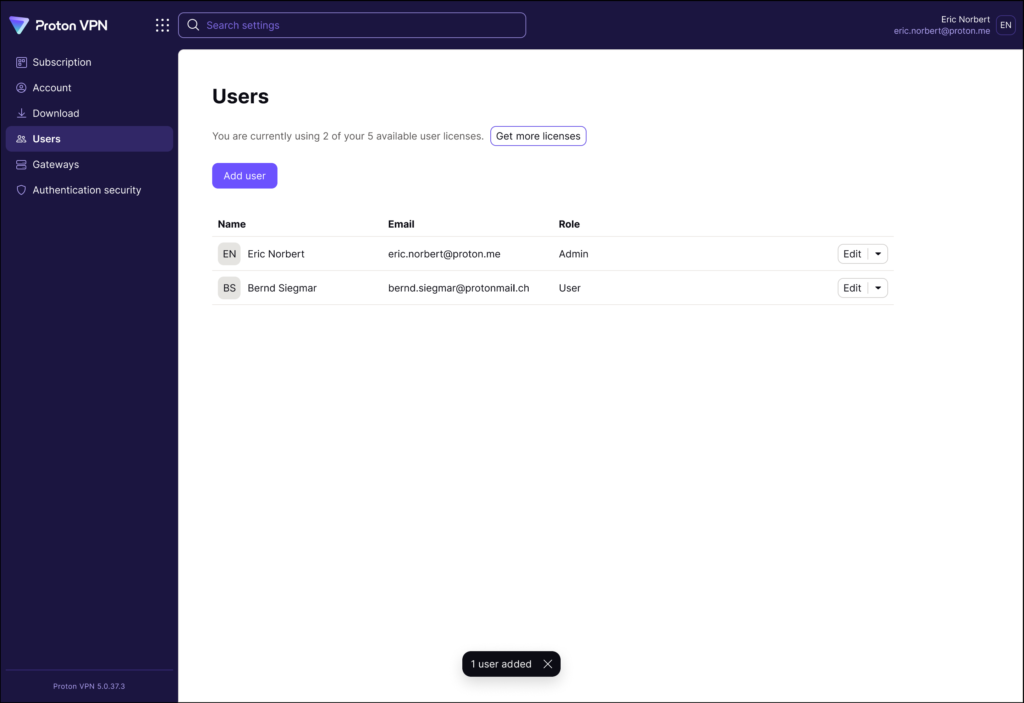
4. The new user will appear on the users screen. You can edit users anytime.
5. Share the password with the user so they can log into their account for the first time.
Learn how to edit user accounts
How to add multiple users to your organization
1. Log in at account.protonvpn.com with your Proton Account username and password.
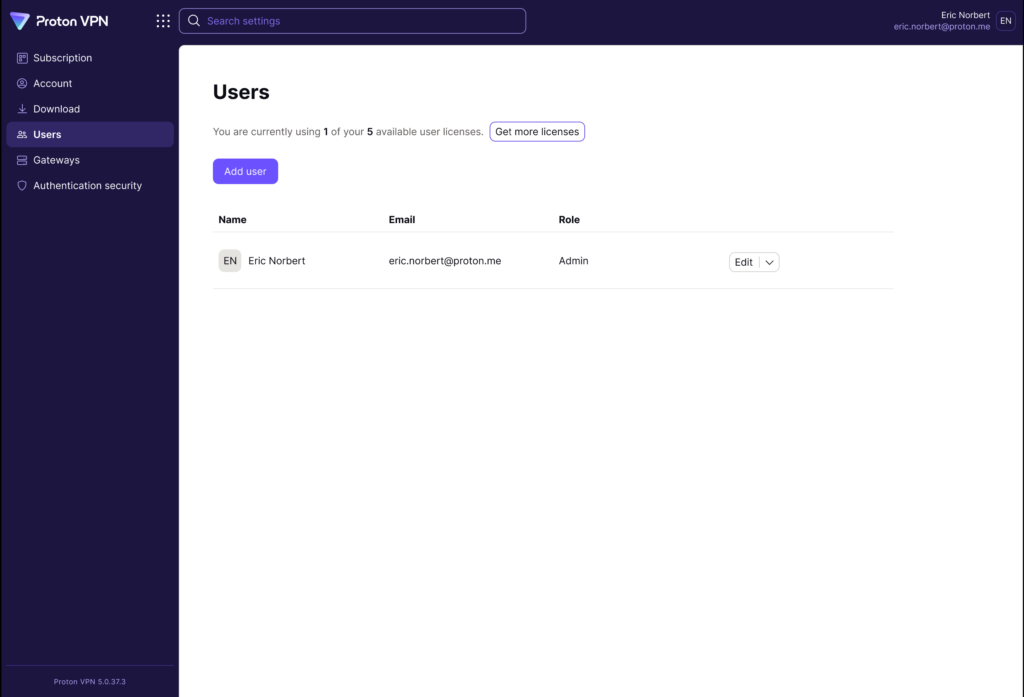
2. Click on Users in the menu on the left, then click Add user.
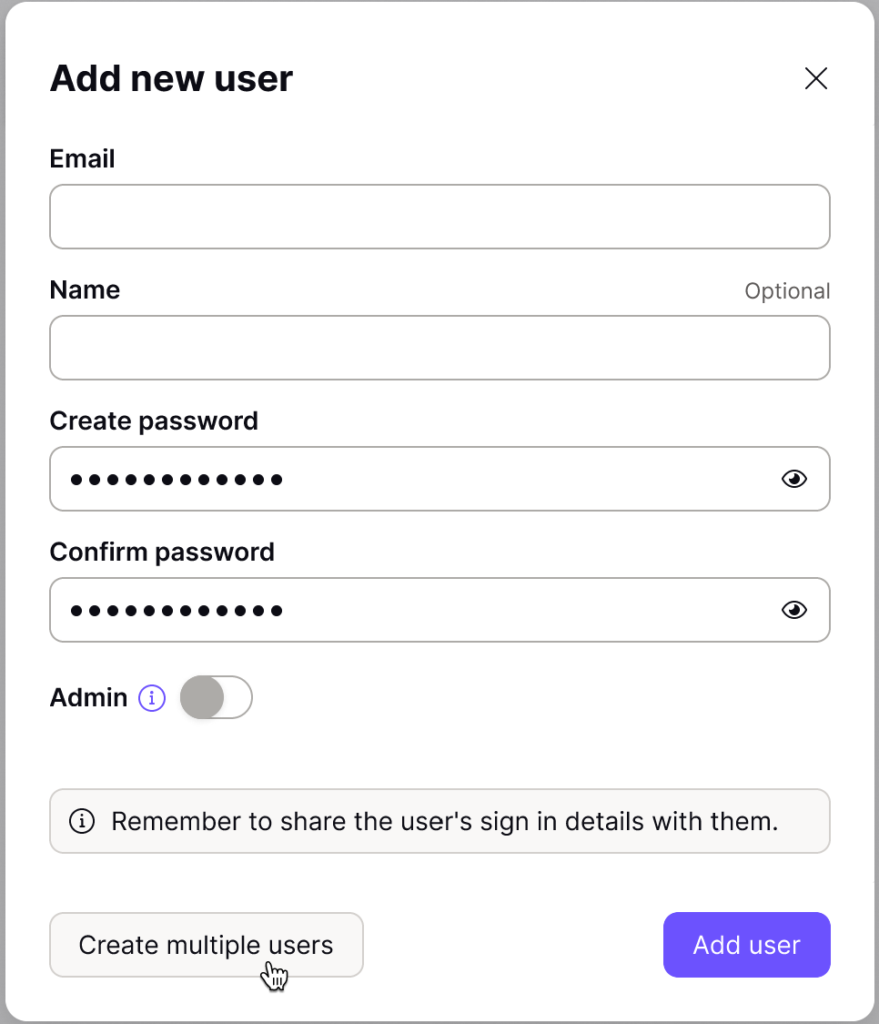
3. Click Create multiple users.
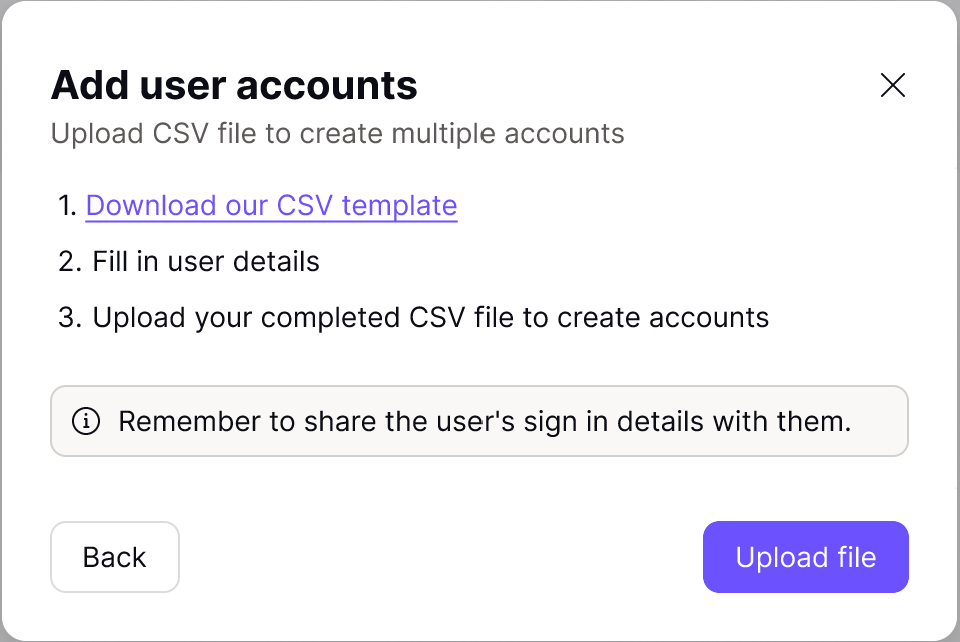
4. This will start a download of a CSV file. Following the template on the file, fill in each user’s email address, username, and password into the correct fields.
Make sure you save the CSV file once you’ve finished filling it out.
5. When you’re done, go back to the Proton VPN settings window and click Upload file. Select the CSV file you just finished filling out.
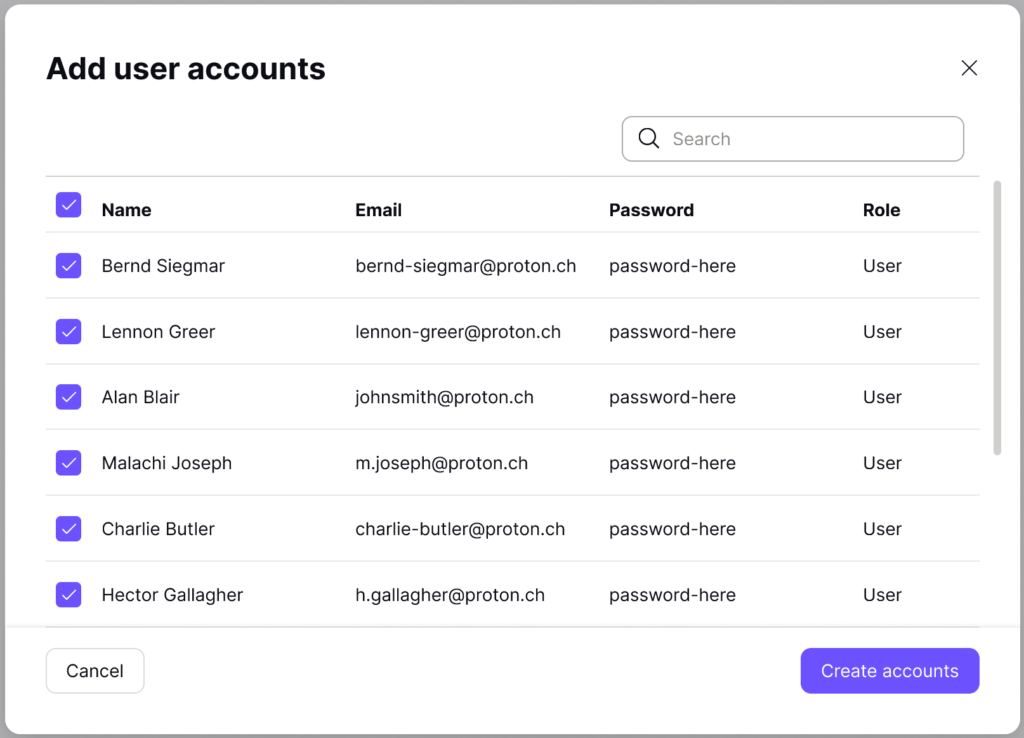
6. You’ll see a list of all the users’ details from your CSV file. Click Create accounts to proceed.
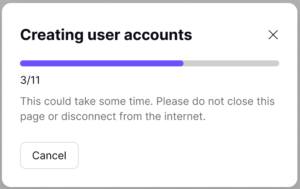
7. You’ll see a loading screen. Depending on how many users you’re adding, it could take several minutes. Don’t close the page or disconnect from the internet or you’ll interrupt the upload.
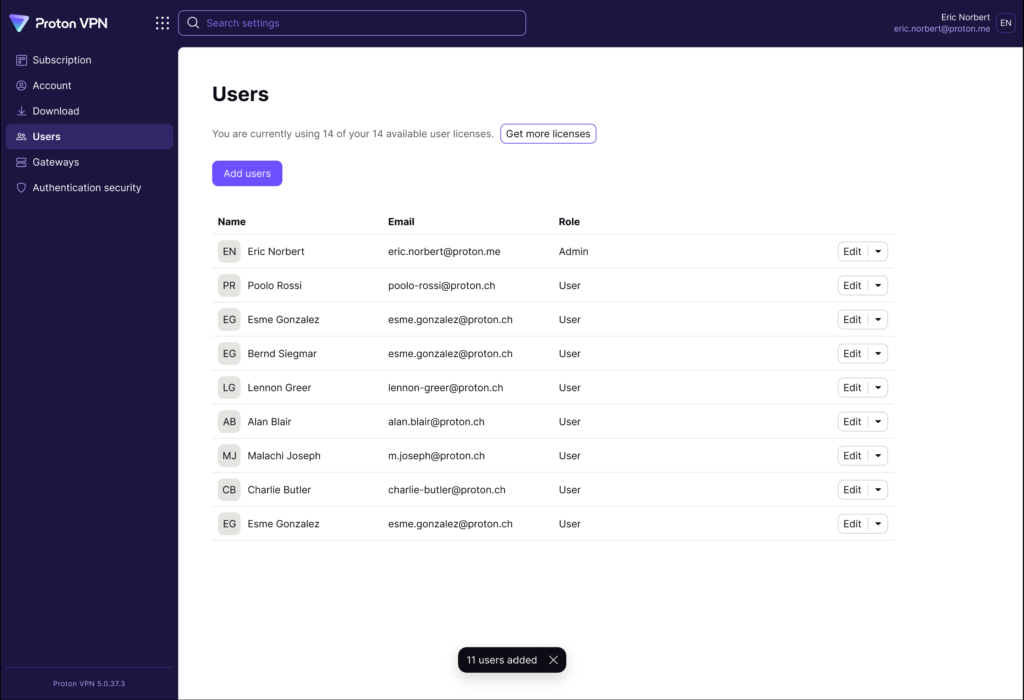
8. The new users should appear on the user’s screen. You can edit users anytime.
9. Share the passwords you’ve chosen for each user, so they can log into their accounts for the first time.